
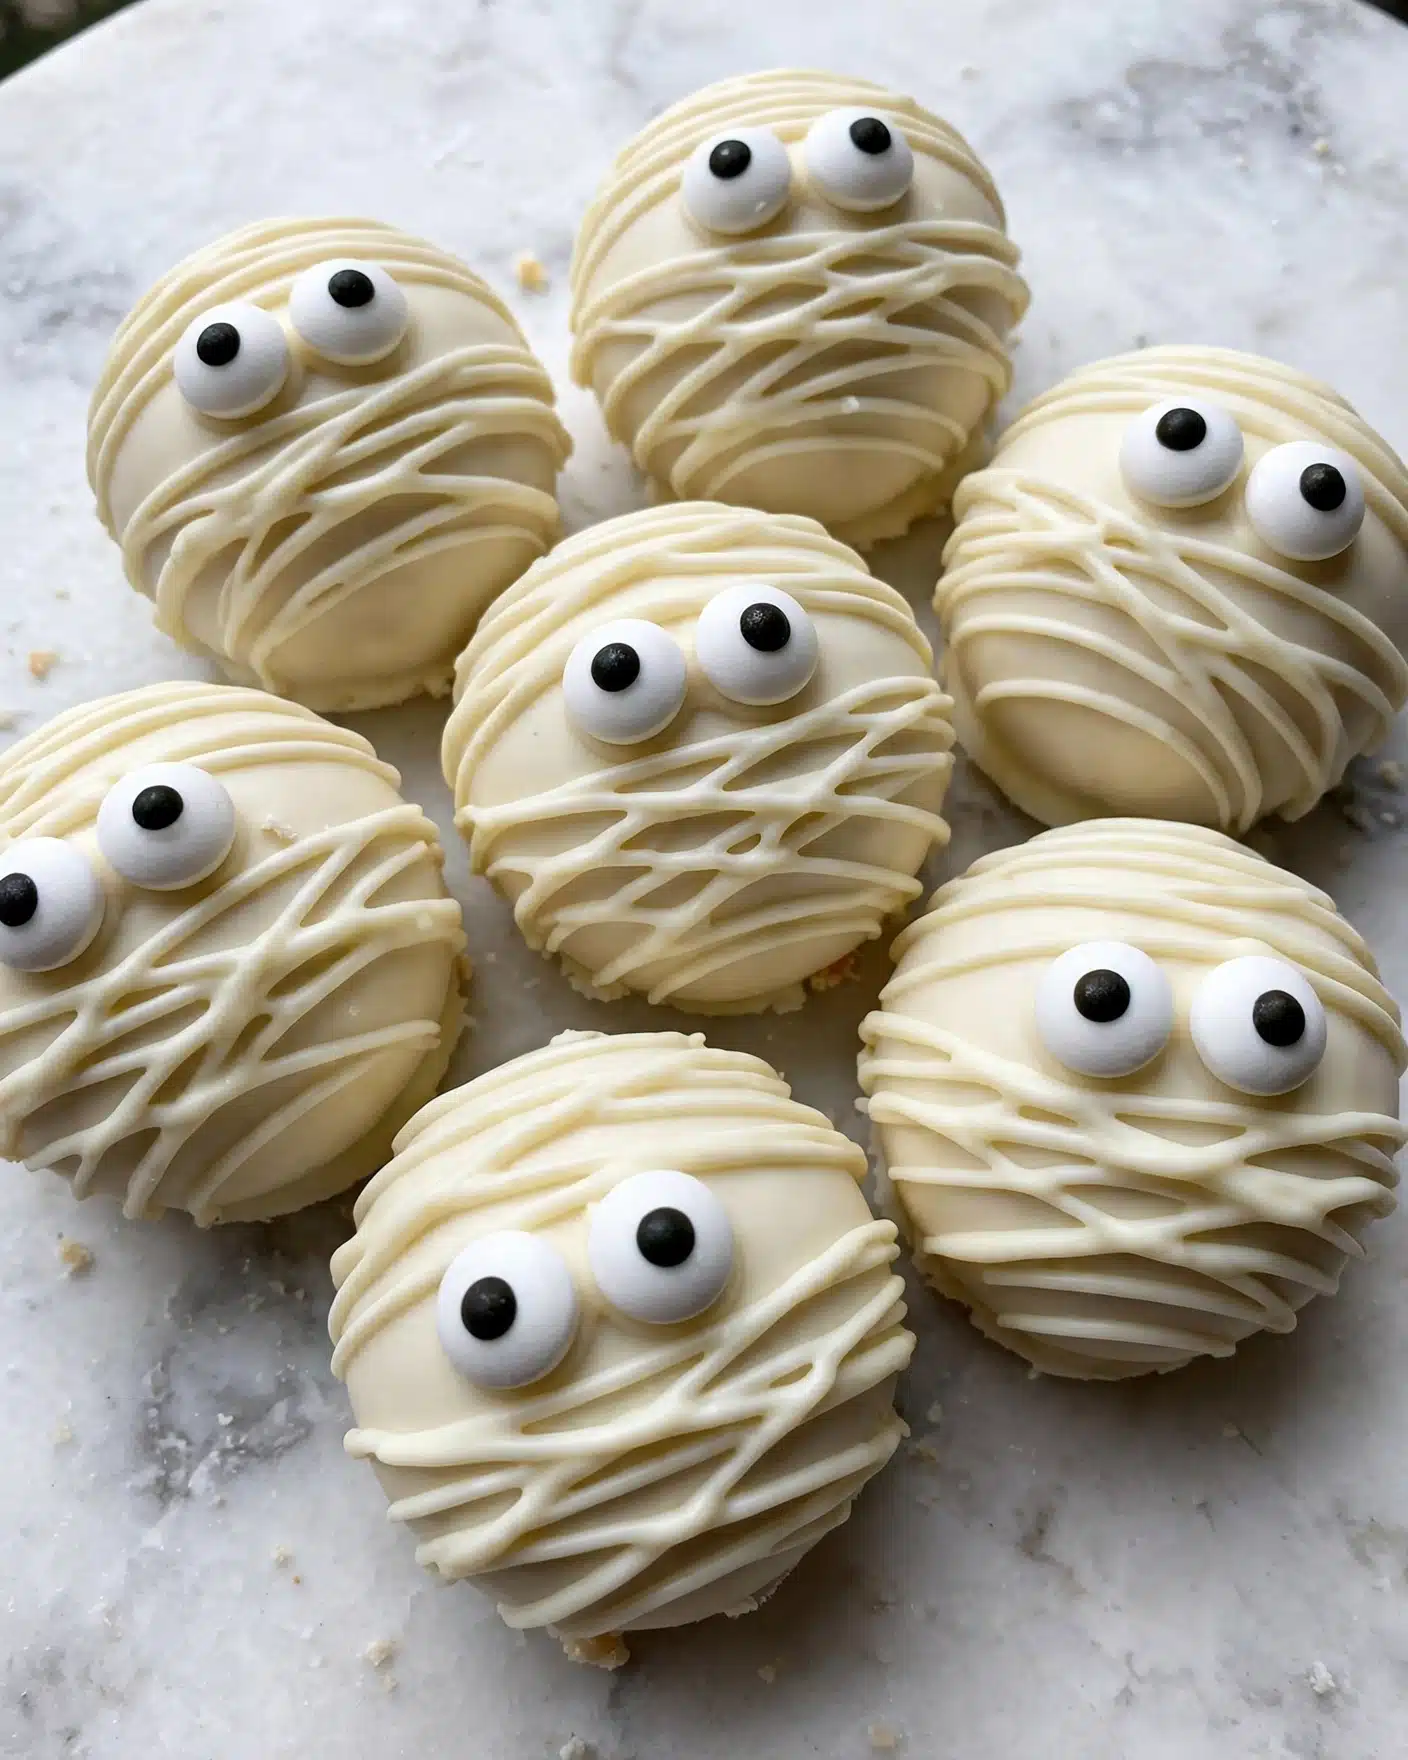
I’m so excited to share this Mummy Cookie Dough Truffles Recipe with you because it combines two of my favorite things: creamy edible cookie dough and the festive fun of Halloween! These little treats are not just adorable with their spooky mummy look, but they’re also utterly delicious—soft, chewy, and full of chocolatey goodness, all wrapped in silky white chocolate. If you’re looking for an easy dessert that will impress your guests and bring smiles, this is definitely one you’ll want to try.
Why You’ll Love This Mummy Cookie Dough Truffles Recipe
I absolutely adore how this recipe hits the perfect balance between indulgence and fun. The flavor profile is like cookie dough heaven, rich with buttery sweetness, studded with melty chocolate chips, and complemented by the creamy white chocolate coating. Each bite feels like a little party in your mouth, especially with those creepy cute candy eyes topping every truffle. It’s the kind of treat I find myself popping one after another, even when I’m not celebrating Halloween!
Another thing that makes me recommend this Mummy Cookie Dough Truffles Recipe all the time is just how approachable it is. I mean, no baking the dough itself, just a quick heat treatment of the flour, and then you get to enjoy that buttery cookie dough right away. The rolling, freezing, and dipping steps turn making dessert into a cozy, hands-on experience, and it’s perfect for making with kids or friends. Whether I’m prepping for a party, sending treats to school, or just craving a fun snack, these truffles are always a hit and stand out because of their festive twist and velvety texture.
Ingredients You’ll Need
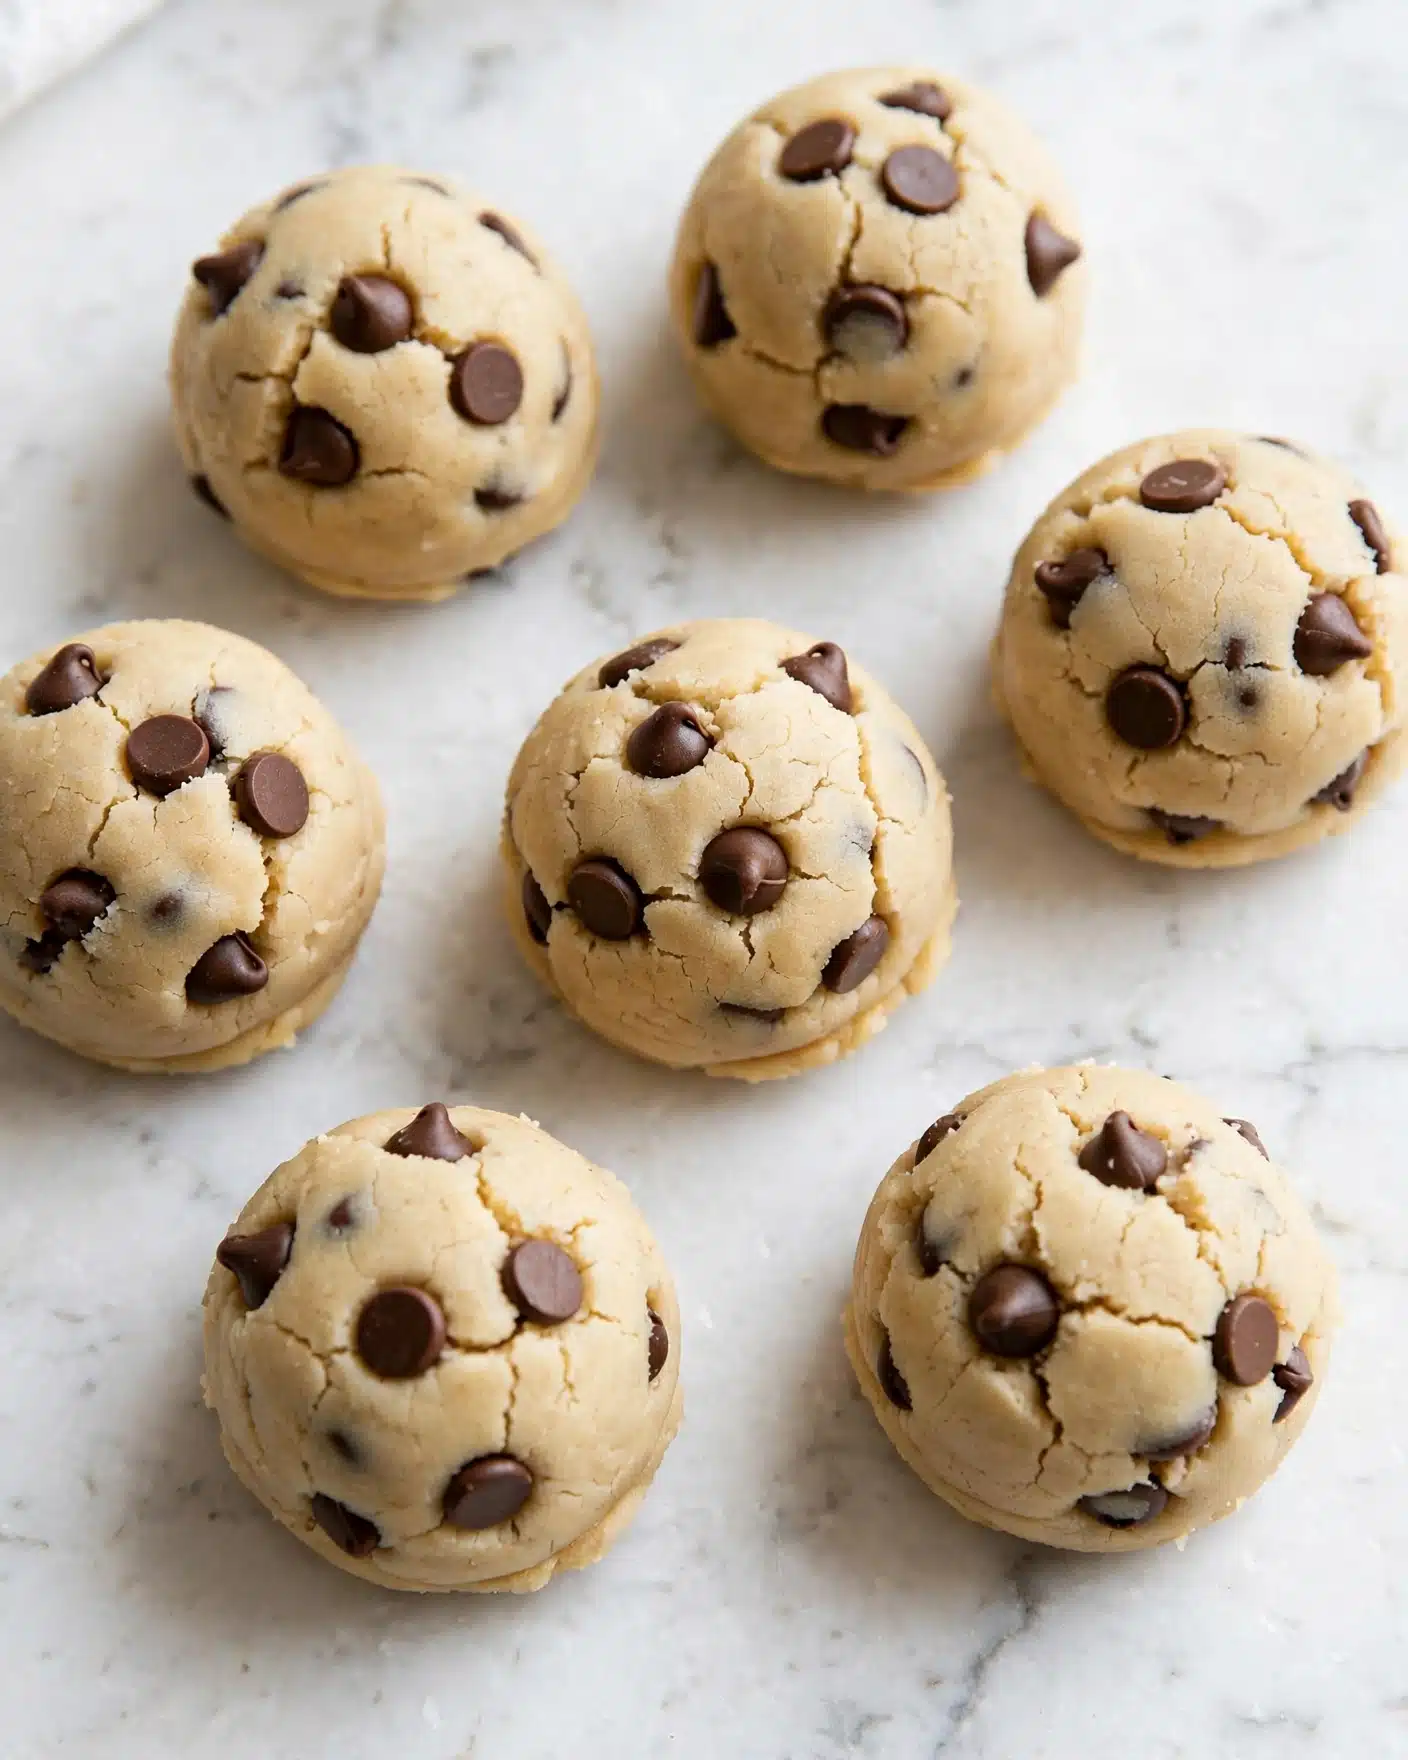
The best part about this recipe is how simple yet thoughtfully chosen each ingredient is. Every element plays a crucial role in creating the ideal texture, taste, and fun spooky presentation that make these truffles unforgettable.
- Butter 100 g: Softened butter adds that luscious, rich base for the cookie dough’s creamy texture.
- Dark or light brown sugar 50 g: Brown sugar gives depth and a subtle molasses note that makes the dough perfectly sweet.
- Caster sugar 30 g: Gives a lovely fine sweetness that blends seamlessly with the brown sugar for balanced flavor.
- Plain flour 175 g: Heat-treated to make it safe to eat raw and adds structure to the dough without any bitterness.
- Milk 2 tablespoons: Helps bring the dough together with a touch of moisture for softness.
- Chocolate chips 100 g: Whether dark, milk, or white chocolate, these chips add bursts of melty chocolate goodness in every bite.
- White chocolate 300 g: Used for coating the truffles and creating the mummy bandage effect; creamy and smooth.
- Edible eyes 30 pieces: The perfect spooky finishing touch that turns these truffles from tasty treats into Halloween stars.
Directions
Step 1: Begin by heat treating your plain flour to make it safe to eat raw. Preheat your oven to 160°C (320°F or Gas Mark 2). Spread the flour evenly on a baking tray lined with parchment paper and bake it for about 7 minutes. I find this is just enough time to kill any bacteria without affecting the flour’s texture. Once baked, set it aside to cool completely, which usually takes around 30 minutes.
Step 2: In a medium-sized bowl, cream together your softened butter with both the dark or light brown sugar and caster sugar. I like to beat it until it becomes light and fluffy, which takes about 1 to 2 minutes. This step is key for a soft, airy cookie dough base.
Step 3: Once your flour has fully cooled, add it to the creamed butter and sugar mixture along with the milk. Mix everything together until a soft dough forms. Don’t overmix—just combine until you have a smooth, pliable dough you can roll into balls.
Step 4: Gently fold in the chocolate chips so they’re evenly distributed throughout the dough. These add delightful chocolate bites in every truffle and really elevate the flavor.
Step 5: Scoop roughly 30-gram portions of dough and roll each into a smooth ball. I find it easiest to use a tablespoon or cookie scoop for consistent sizing. Place the balls on a parchment-lined baking sheet and pop them in the freezer for about 15 minutes to firm up—this helps with dipping later.
Step 6: While the cookie dough balls chill, melt your white chocolate gently using your preferred method—either in short bursts in the microwave or over a bain-marie. Aim for a smooth, glossy consistency that will coat each truffle beautifully.
Step 7: Take a cookie dough ball, and using a fork, roll it around in the melted white chocolate until fully coated. Let any excess chocolate drip back into your bowl. Place each coated truffle back on the lined tray.
Step 8: Freeze the coated truffles again for about 5 minutes to set the white chocolate shell. Meanwhile, melt a little extra white chocolate to drizzle over the truffles, creating the mummy’s bandages look.
Step 9: After drizzling, gently place two edible eyes on each truffle while the drizzle is still wet so they stick perfectly. Allow the truffles to finish setting in the fridge or freezer until the chocolate is fully hardened.
Servings and Timing
This recipe makes about 30 delightful mummy cookie dough truffles—perfect for sharing at parties or gifting to friends. The prep time is roughly 25 minutes, not including the cooling time for the flour and chilling time for the truffles. Cooking time specifically applies to heat-treating the flour and chocolate melting, totaling around 15 minutes. Including all chilling and setting steps, plan for approximately 1 hour and 30 minutes from start to finish to get these beauties ready to enjoy.
How to Serve This Mummy Cookie Dough Truffles Recipe
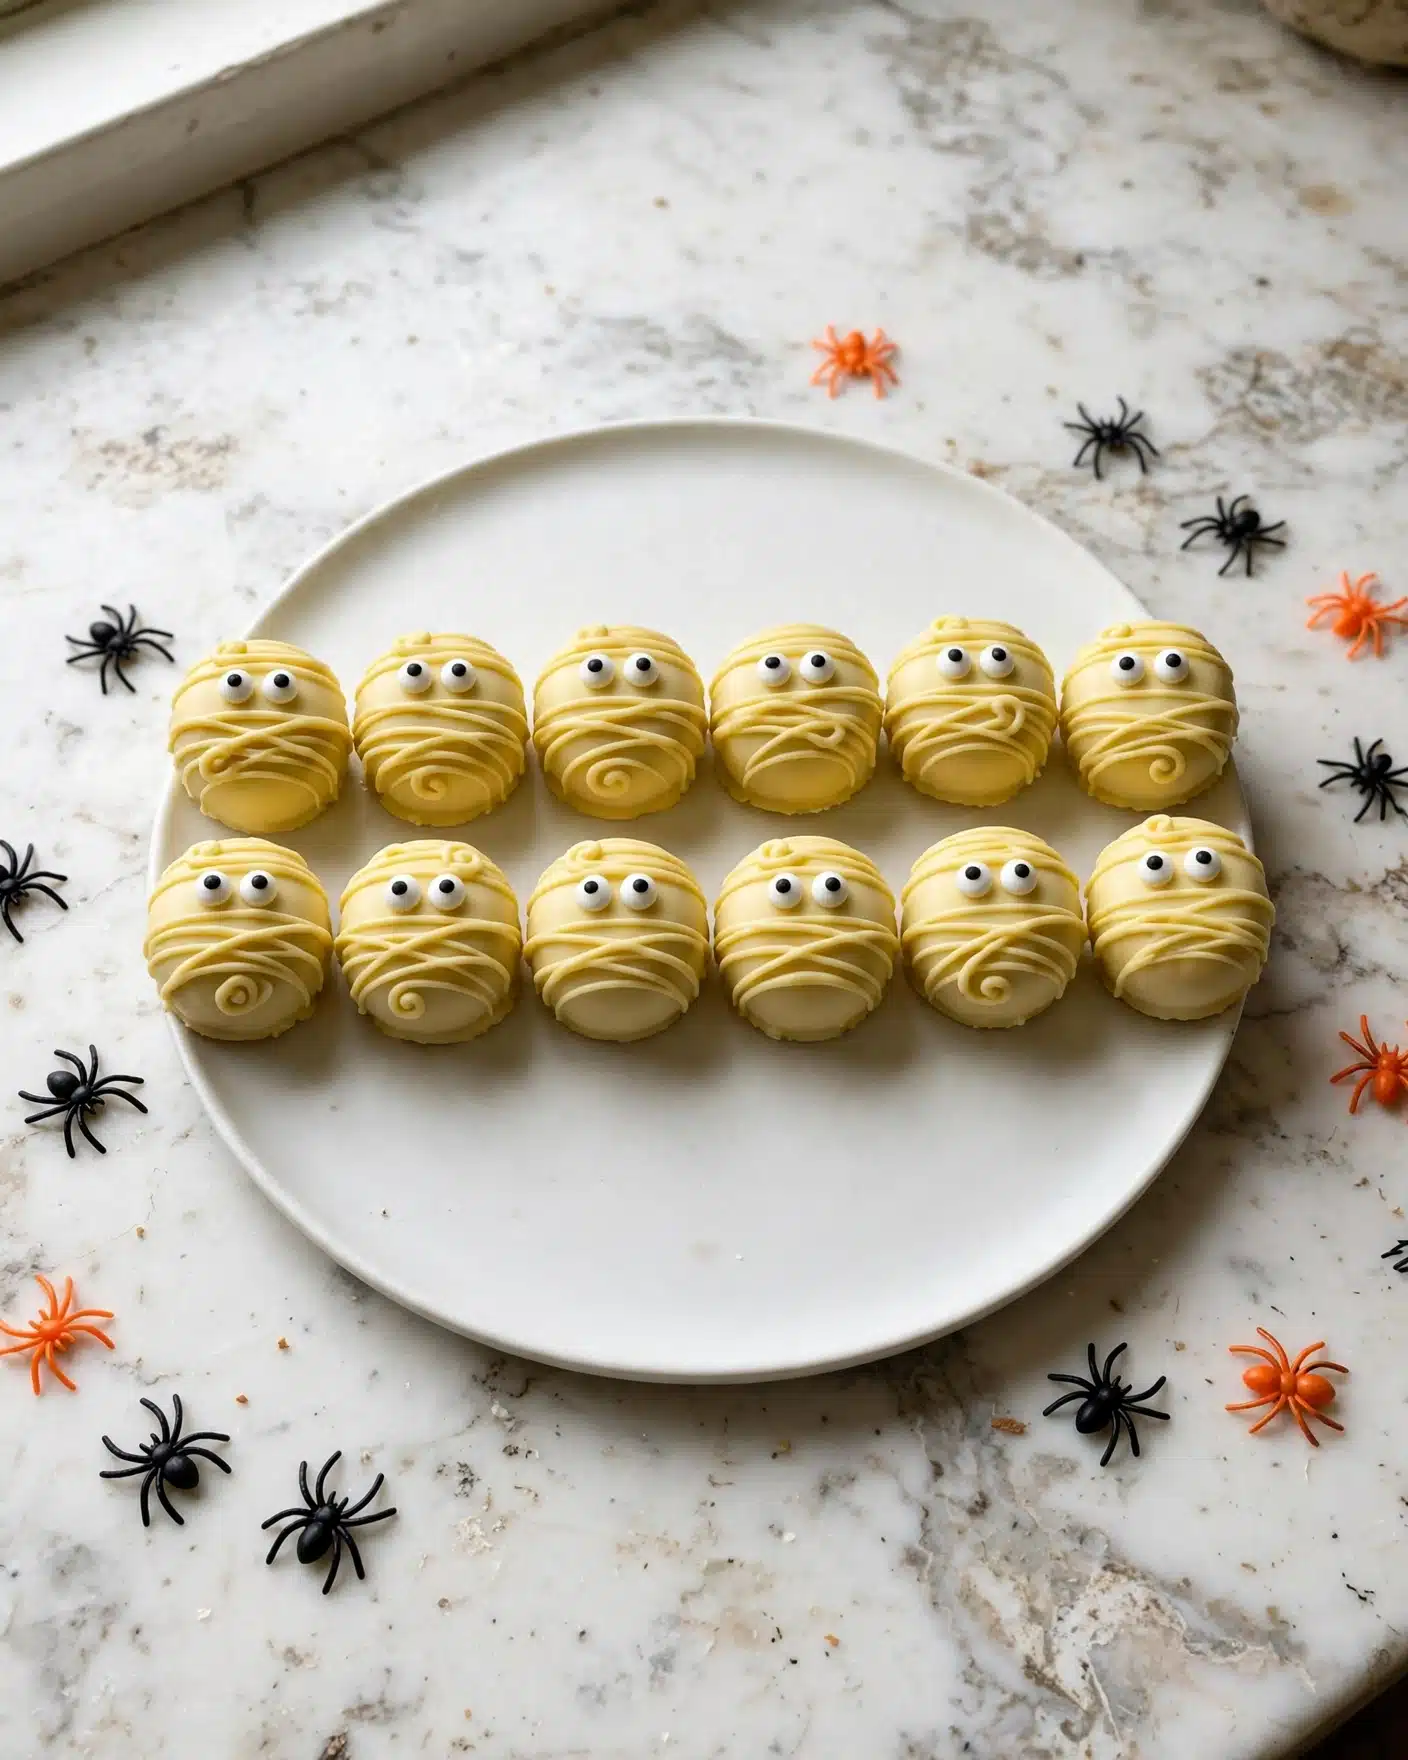
When I serve these mummy cookie dough truffles, I love setting them out on a Halloween-themed serving platter with a few fresh autumn leaves or mini pumpkins around for a festive touch. These truffles shine as finger food at parties, so I usually arrange them in neat rows or cute clusters to make them easy for guests to grab. Since they’re rich and sweet, I recommend serving them slightly chilled or at room temperature—the white chocolate coating holds up best when cool, but the cookie dough inside is soft enough to melt in your mouth.
They pair wonderfully alongside a cup of freshly brewed coffee or rich hot chocolate when serving at fall gatherings. For adults, I sometimes suggest a chilled glass of dessert wine like Moscato or a lightly spiced cocktail to complement the creamy sweetness. These truffles are ideal for Halloween parties, school bake sales, or even as a special treat during a cozy weeknight movie night. I also love gifting them in little boxes tied with orange and black ribbons—everyone loves receiving these festive bites!
For presentation, don’t be shy about adding a sprinkle of cocoa powder dusted around the serving plate or a drizzle of extra chocolate (dark or milk) alongside these white chocolate mummies. Portion-wise, they make perfect bite-sized treats, so I usually plan for 2-3 per person depending on appetite and occasion.
Variations
I have so much fun playing around with this Mummy Cookie Dough Truffles Recipe to suit different tastes and dietary needs. For instance, if you want to switch it up, try using peanut butter or almond butter in place of some of the butter for a nutty twist. You could also swap out the chocolate chips for mini butterscotch or even toffee bits to give a new dimension to the flavor. I love these ideas when I want to surprise my friends with a new taste but keep the same familiar texture and festive look.
If you’re following gluten-free or vegan diets, I’ve experimented with gluten-free flour blends that are heat-treated the same way, and they work beautifully in this recipe. For a vegan option, coconut oil in place of butter and dairy-free chocolate chips keep the recipe accessible to everyone. When it comes to the white chocolate coating, there are plenty of dairy-free white chocolate alternatives that melt nicely and still give you that creamy mummy bandage effect.
Another great twist is to play with the decoration! Instead of edible eyes, I sometimes use tiny candy spiders or draw fun faces with colored icing. If you want an even simpler approach, just drizzle the white chocolate without the bandages or make a double chocolate version by dipping in dark chocolate instead of white. These variations keep the recipe fresh and fun season after season.
Storage and Reheating
Storing Leftovers
If you happen to have any of these delicious mummy truffles left, I always store them in an airtight container or covered plate in the fridge. This keeps the white chocolate coating crisp and the cookie dough fresh inside. Stored this way, they retain their best texture for up to one week, which is perfect if you want to prepare them ahead of time for a party or event.
Freezing
These truffles freeze very well, which is one of their best features for making in advance. I like to place them on a baking sheet in a single layer, freeze until firm, then transfer to a freezer-safe container or zip-top bag. This prevents them from sticking together and helps maintain their shape. You can keep them frozen for up to 2 months. When you’re ready to enjoy, just thaw them overnight in the fridge for the best texture.
Reheating
Since these are no-bake cookie dough treats coated in chocolate, I don’t recommend reheating them with heat like you would a baked dessert. To enjoy them at their best, simply serve chilled or at room temperature. If your truffles have been stored in the fridge and the white chocolate looks dull or slightly rough, letting them sit at room temperature for 10-15 minutes will gently soften the coating without losing that lovely snap.
FAQs
Is it safe to eat raw cookie dough in this recipe?
Yes! The flour is heat-treated by baking it before mixing to kill any bacteria, making it safe for consumption raw. That’s an important step I never skip. Just make sure to cool the flour completely before using. Also, this recipe contains no eggs, which further helps keep it safe to enjoy raw.
Can I use other types of chocolate for the coating?
Definitely! While white chocolate gives that classic mummy look, you can swap it for milk or dark chocolate if you prefer a richer or less sweet coating. Just melt the chocolate gently and dip as usual. Keep in mind the visual effect will be different but equally delicious.
How long do these truffles last once made?
Stored in the fridge in an airtight container, they last up to one week. Beyond that, the texture of the cookie dough can start to change, and the white chocolate coating might dull. For longer storage, freezing is your friend, extending shelf life up to two months.
Can I make these truffles in advance for a party?
Absolutely! I often make mine a day or two ahead. Prepare, decorate, and store them properly in the fridge. The flavors even improve as they rest together. Plus, you avoid last-minute dessert stress, which is always a win.
What if I don’t have edible eyes? Any other decoration ideas?
If you can’t find edible eyes, don’t worry! You can use mini chocolate chips, small candies, or piped icing dots for eyes. Sometimes I even draw little faces with melted chocolate using toothpicks. It adds a whimsical touch and keeps the mummy vibe fun and festive.
Conclusion
I really hope you give this Mummy Cookie Dough Truffles Recipe a try because it’s such a delightful, easy way to bring fun and flavor together. Whether you’re baking for Halloween or just craving a special sweet treat, these truffles never disappoint, and they always bring smiles. Trust me, once you’ve made these, they’ll become a favorite go-to for every spooky season and beyond!
PrintMummy Cookie Dough Truffles Recipe
Mummy Cookie Dough Truffles are a delightfully spooky and creamy Halloween treat combining edible cookie dough coated in white chocolate and decorated with edible eyes and white chocolate ‘bandages’. Perfect for festive celebrations and easy to make with simple ingredients.
- Prep Time: 20 minutes
- Cook Time: 10 minutes
- Total Time: 1 hour 30 minutes
- Yield: 30 truffles
- Category: Dessert
- Method: No-Cook
- Cuisine: American
Ingredients
Edible Cookie Dough
- 100 g butter (salted or unsalted), softened
- 50 g dark or light brown sugar
- 30 g caster sugar
- 175 g plain flour
- 2 tablespoons milk
- 100 g dark, milk, or white chocolate chips
White Chocolate Coating/Decoration
- 300 g white chocolate
- 30 edible eyes (e.g., Cake Décor brand)
Instructions
- Heat treat the flour: Preheat the oven to 160°C (320°F) or Gas Mark 2. Line a large baking tray with parchment paper and spread the plain flour evenly. Bake for 5-10 minutes (recommend 7 minutes), then remove and let the flour cool completely for about 30 minutes to make it safe for raw consumption.
- Make the cookie dough: In a medium mixing bowl, cream together softened butter, dark or light brown sugar, and caster sugar until light and fluffy, about 1-2 minutes. Add the cooled flour and milk, mixing until a dough forms. Gently fold in the chocolate chips.
- Form dough balls and chill: Portion the dough into roughly 30g balls, rolling them evenly. Place the balls on a lined baking tray and put them in the freezer for 15 minutes to firm up.
- Melt the white chocolate: Melt the white chocolate either in the microwave in short bursts or using a bain-marie (a bowl set over simmering water), stirring until smooth.
- Coat the dough balls: Using a fork, dip each cookie dough ball fully into the melted white chocolate, allowing excess to drip off. Place coated balls back onto the lined tray and return them to the freezer for 5 minutes to set.
- Decorate the truffles: Drizzle the remaining white chocolate over the set truffles to create ‘bandage’ effects. Attach two edible eyes to the top of each truffle to complete the mummy look.
- Set and store: Let the truffles fully set in the fridge or freezer before serving. Store in an airtight container in the refrigerator for up to one week.
Notes
- Heat treating the flour is essential to make it safe for raw consumption.
- Keep the dough balls chilled to ensure they hold their shape when coated.
- Use good-quality white chocolate for a smooth coating and easier melting.
- Store truffles in the fridge for up to one week; freeze for longer storage.
- Decorate creatively with edible eyes or other Halloween-themed decorations for a festive appearance.


