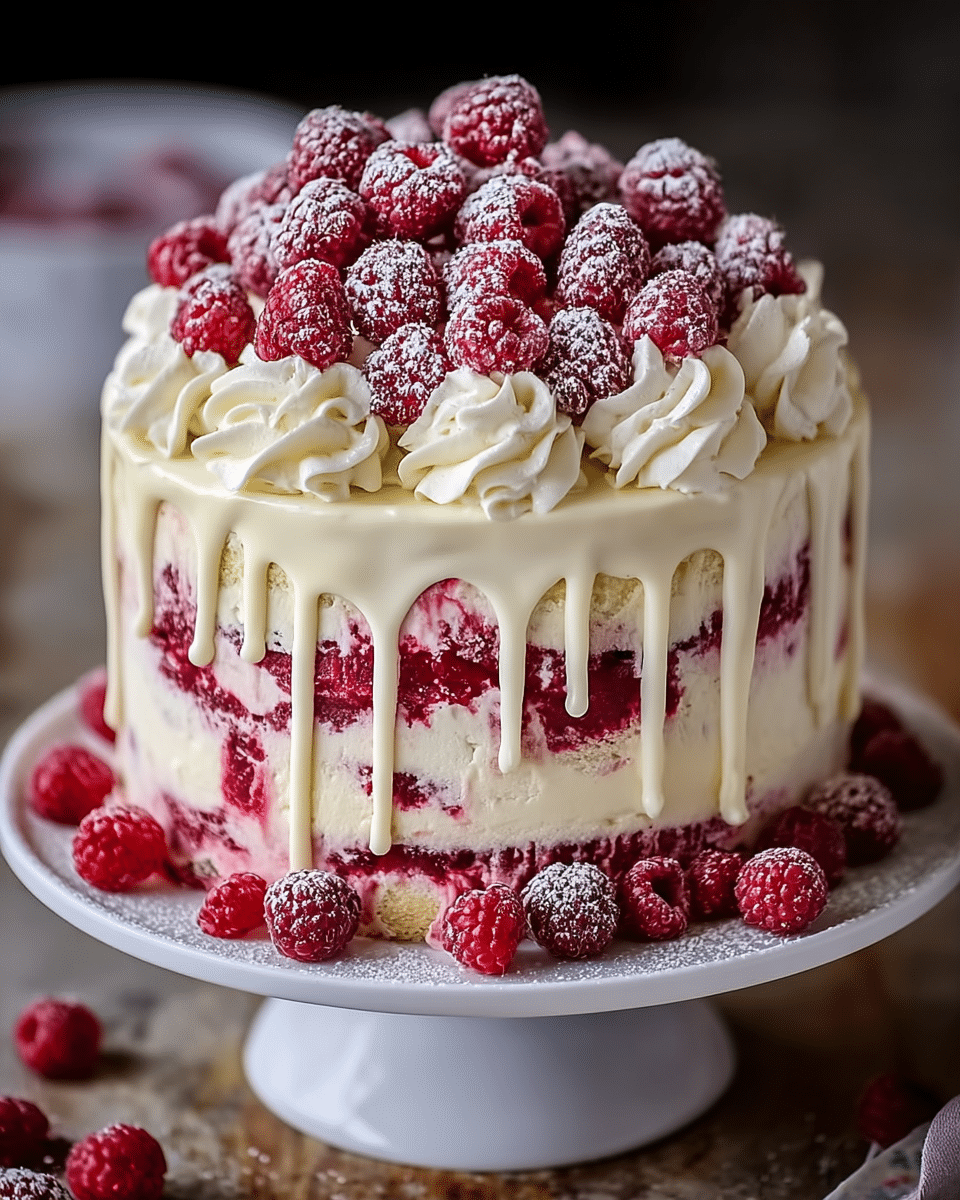
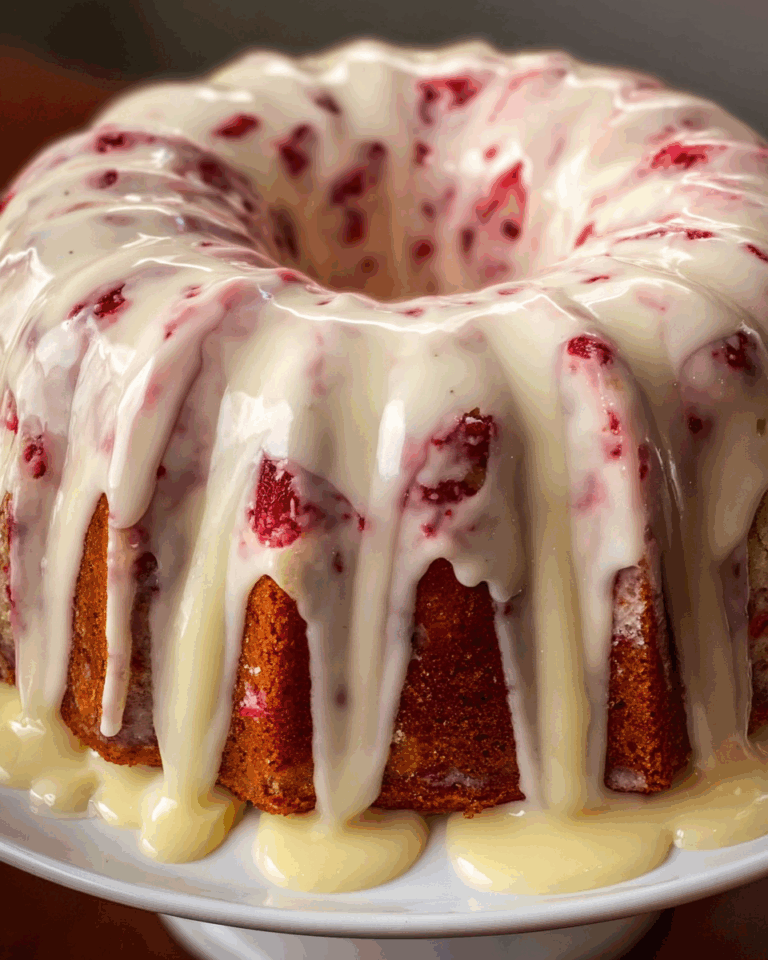
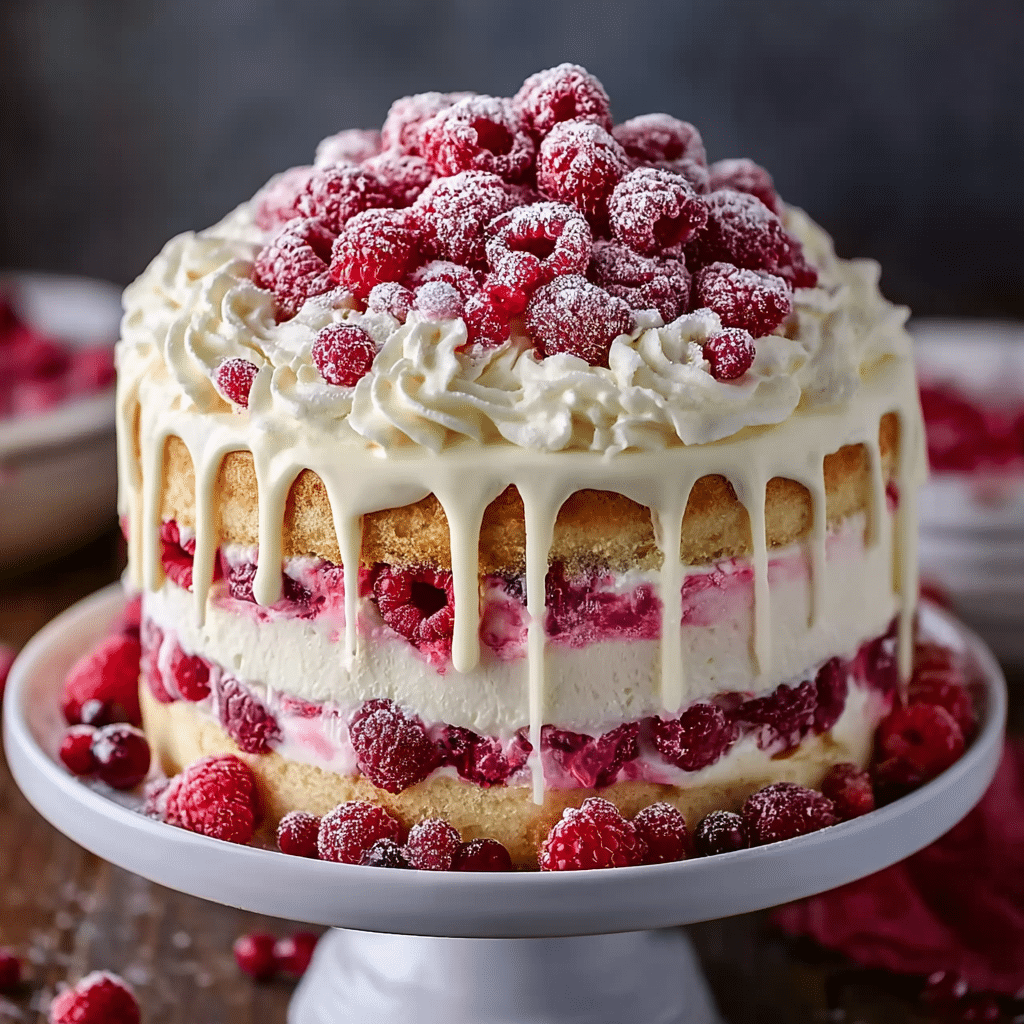
If you’re the kind of friend who loves to wow a crowd or bring a little extra excitement to an ordinary weekday, this White Chocolate Raspberry Dream Cake : A Heavenly Dessert is about to become your new signature treat. Light layers of buttery cake kissed with luscious white chocolate meld beautifully with a tangy raspberry filling. Each forkful carries you straight to dessert heaven—perfect for celebrations, coffee catch-ups, or simply treating yourself. If ever there was a “just because” cake, this is it!
Ingredients You’ll Need
This recipe relies on simple but essential ingredients, each playing a starring role in flavor, texture, or sheer elegance. With these pantry staples and a few special additions, you’ll create a cake that’s both stunning and deliciously memorable.
- All-purpose flour: Gives the cake its sturdy, moist crumb while keeping it light enough for those fluffy layers.
- Baking powder: Ensures the cake rises beautifully for a tender, airy bite.
- Salt: Just a touch amplifies all the sweet, rich flavors.
- Unsalted butter: Provides a creamy richness both in the cake and frosting—make sure it’s softened for the dreamiest texture.
- Granulated sugar: Sweetens the cake just right, creating a classic golden crust.
- Eggs: Add structure and help bind everything together for perfectly set slices.
- Vanilla extract: Enhances all the aromatic notes in each component.
- White chocolate chips, melted: Brings indulgent sweetness and a velvety mouthfeel—never skip this!
- Whole milk: Keeps your layers moist and plush, with just the right richness.
- Raspberries (fresh or frozen): Their vibrant flavor and punchy color make the filling irresistible.
- Sugar (for the filling): Balances the bold tartness of the raspberries beautifully.
- Lemon juice: A splash brightens and sharpens the filling—don’t leave it out!
- Cornstarch (with water): Thickens the filling for perfect layers that don’t ooze.
- Powdered sugar: Essential for silky-smooth frosting that’s never gritty.
- White chocolate (melted, for frosting): Doubles down on decadence—this is a dream cake, after all.
- Milk (for frosting): Adjusts your frosting’s consistency to pure perfection.
- Optional garnishes—fresh raspberries, white chocolate curls, mint leaves: They add color and flair, making your masterpiece as beautiful as it is delicious.
How to Make White Chocolate Raspberry Dream Cake : A Heavenly Dessert
Step 1: Prep the Pans and Oven
Begin by preheating your oven to 350°F. Grease and flour three 8-inch round cake pans—this ensures your cake layers come out effortlessly and perfectly golden, without sticking to the pan. Taking time here sets the stage for a drama-free assembly later.
Step 2: Mix the Dry Ingredients
Whisk the flour, baking powder, and salt together in a medium bowl. This quick step disperses the leavening evenly and guarantees a uniform rise for all your cake layers. It may seem simple, but it matters!
Step 3: Cream Butter and Sugar
In a large mixing bowl, beat your softened butter and sugar until the mixture is light and fluffy—it should look pale and feel airy. This process is key to that signature soft, tender crumb that makes White Chocolate Raspberry Dream Cake : A Heavenly Dessert so irresistible.
Step 4: Add Eggs, Vanilla, and White Chocolate
Add the eggs, one at a time, beating well after each addition. Follow up with fragrant vanilla extract and the star of the show: melted white chocolate. This step infuses the batter with buttery, luxurious flavor and helps bring the “dream” element to life!
Step 5: Combine Wet and Dry Ingredients Alternately
Alternate adding the flour mixture and milk to the wet ingredients—begin and end with flour. Be careful not to overmix; stop as soon as everything is just combined. This gentle touch keeps your layers tender and avoids any denseness.
Step 6: Bake the Cake Layers
Divide the batter evenly among your prepared pans and bake for 25–30 minutes. Test doneness with a toothpick—when it comes out clean, they’re perfect. Let them cool in the pans for 10 minutes, then transfer to wire racks to finish cooling completely for the ideal texture.
Step 7: Make the Raspberry Filling
While your cakes bake, add raspberries, sugar, and lemon juice to a saucepan over medium heat. Stir as the berries break down, filling your kitchen with their bright aroma. Add your cornstarch slurry and keep stirring until you have a thick, glossy mixture. Cool it completely so your frosting doesn’t melt later.
Step 8: Whip Up the White Chocolate Frosting
Cream your butter until it’s smooth and silky, then gradually whip in powdered sugar for that fluffy texture. Stir in the cooled, melted white chocolate, vanilla, and enough milk to create a spreadable consistency—it should glide across your cake.
Step 9: Assemble Your Cake
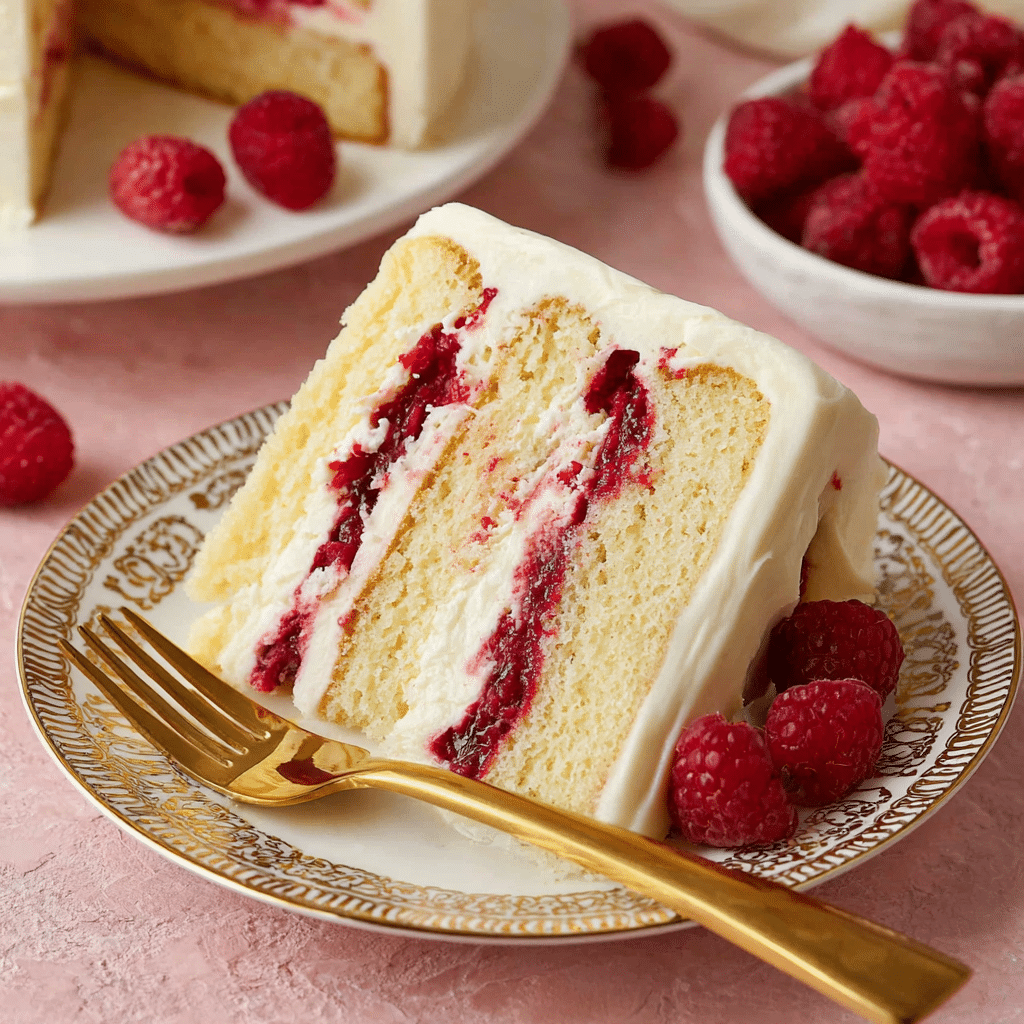
If needed, level your cake layers for picture-perfect stacking. Place the first layer down, spread a generous layer of white chocolate frosting, then a layer of the dreamy raspberry filling. Repeat for the next layer. Frost the top and sides of your cake with the remaining frosting.
Step 10: Decorate and Chill
Finish your masterpiece by garnishing with fresh raspberries, white chocolate curls, or elegant piping. For the cleanest, swoon-worthy slices, chill the assembled cake for at least 30 minutes. This helps the flavors meld and the structure set perfectly.
How to Serve White Chocolate Raspberry Dream Cake : A Heavenly Dessert
Garnishes
Garnishing is where you get to truly shine! I love to scatter fresh raspberries and swirl on extra frosting for a showstopping look. White chocolate curls add a touch of glamour, while mint leaves bring a pop of color and aroma. Guests always gasp—then quickly ask for seconds.
Side Dishes
Pair your White Chocolate Raspberry Dream Cake : A Heavenly Dessert with sides like vanilla bean ice cream, a dollop of whipped cream, or even a light, zesty fruit salad. These let the cake’s flavors soar, while cleansing the palate between bites of all that richness.
Creative Ways to Present
For celebrations, you might cut the cake into petite squares and serve each atop a puddle of raspberry coulis. Or, try layering slices in dessert jars with extra raspberry sauce and swirls of whipped cream—it’s a playful, portable way to share the magic at picnics or parties!
Make Ahead and Storage
Storing Leftovers
Store leftover White Chocolate Raspberry Dream Cake : A Heavenly Dessert in an airtight container in the fridge for up to four days. The flavors only deepen, and that filling soaks into the cake just enough to make each bite dreamy—even days later.
Freezing
This cake also freezes beautifully! Place individual slices or the whole assembled cake (minus any delicate garnishes) in the freezer, tightly wrapped, for up to two months. For added freshness, wrap first in plastic and then foil.
Reheating
If you prefer enjoying your cake slightly warm, just let a slice sit at room temperature for 20–30 minutes, or give it a QUICK 10-second zap in the microwave. The white chocolate blends lusciously with the berries—simply irresistible!
FAQs
Can I use frozen raspberries for the filling?
Absolutely! Both fresh and frozen raspberries work beautifully. If using frozen, don’t thaw them first—just cook them straight from the freezer for an equally vibrant, flavorful filling.
What’s the best way to melt the white chocolate?
I recommend melting white chocolate gently in the microwave using 30-second bursts, stirring in between, or in a heatproof bowl over a pot of simmering water. Let it cool slightly before adding to batter or frosting so it blends smoothly and doesn’t seize.
Can I make this cake in advance?
Yes, in fact, assembling the White Chocolate Raspberry Dream Cake : A Heavenly Dessert a day ahead gives the flavors time to meld. Just hold off on garnishing until right before serving for the freshest look.
How do I keep the cake layers from sticking?
Be sure to grease and flour your pans well, and for extra insurance, line the bottoms with parchment rounds. This makes layering and assembly a total breeze—no broken cakes here!
What if I don’t have three cake pans?
You can bake the batter in batches if needed—just keep the remaining batter covered at room temperature while each layer bakes. The effort is worth it for the stunning final result!
Final Thoughts
If you’re ready to transport your taste buds and treat your friends or family to something truly special, go ahead and try this White Chocolate Raspberry Dream Cake : A Heavenly Dessert. Every bite is a reminder of how joyful baking (and sharing!) can be. I know you’ll fall for it—just like I did.
PrintWhite Chocolate Raspberry Dream Cake : A Heavenly Dessert Recipe
Impress your guests with this heavenly White Chocolate Raspberry Dream Cake. A delightful combination of white chocolate cake layers filled with fresh raspberry compote and topped with a luscious white chocolate frosting.
- Prep Time: 25 minutes
- Cook Time: 30 minutes
- Total Time: 55 minutes + cooling/assembly
- Yield: 1 8-inch cake (12 servings)
- Category: Dessert
- Method: Baking
- Cuisine: American
- Diet: Vegetarian
Ingredients
For the cake:
- 2½ cups all-purpose flour
- 2½ tsp baking powder
- ½ tsp salt
- ¾ cup unsalted butter, softened
- 1¾ cups granulated sugar
- 4 large eggs
- 1½ tsp vanilla extract
- ½ cup white chocolate chips, melted
- 1¼ cups whole milk
For the raspberry filling:
- 1½ cups fresh or frozen raspberries
- ½ cup sugar
- 2 tbsp lemon juice
- 2 tbsp cornstarch mixed with 2 tbsp water
For the frosting:
- 1 cup unsalted butter, softened
- 4 cups powdered sugar
- ½ cup white chocolate, melted and cooled
- 2–3 tbsp milk
- 1 tsp vanilla extract
Optional garnish:
- Fresh raspberries
- White chocolate curls or shavings
- Mint leaves
Instructions
- Preheat the oven to 350°F. Grease and flour three 8-inch round cake pans.
- In a medium bowl, whisk together flour, baking powder, and salt. Set aside.
- In a large bowl, beat butter and sugar until light and fluffy. Add eggs one at a time, beating well after each. Stir in vanilla and melted white chocolate.
- Add the flour mixture alternately with the milk, beginning and ending with the flour. Mix until just combined.
- Divide the batter evenly between the prepared pans. Bake for 25–30 minutes, or until a toothpick inserted comes out clean. Let cool in pans for 10 minutes, then transfer to wire racks to cool completely.
- For the raspberry filling, combine raspberries, sugar, and lemon juice in a saucepan. Cook over medium heat until berries break down. Add cornstarch slurry and stir until thickened. Let cool completely.
- For the frosting, beat butter until creamy. Gradually add powdered sugar. Stir in melted white chocolate, vanilla, and milk until desired consistency is reached.
- To assemble, level the cakes if necessary. Place the first layer on a cake board. Spread a thin layer of frosting, then a layer of raspberry filling. Repeat with the next layer.
- Frost the outside and top of the cake. Chill slightly to set. Decorate with fresh raspberries, white chocolate curls, or piped swirls of frosting.
Notes
- Use room temperature ingredients for a smooth batter
- Don’t overmix the batter—stop once ingredients are just combined
- Melt the white chocolate gently and allow it to cool slightly before mixing into the batter or frosting
- Cool the raspberry filling completely before spreading, or it may melt your frosting
- Chill the cake for 30 minutes before slicing for the cleanest cuts
Nutrition
- Serving Size: 1 slice (1/12 of cake)
- Calories: 510 kcal
- Sugar: 45 g
- Sodium: 280 mg
- Fat: 28 g
- Saturated Fat: 17 g
- Unsaturated Fat: 8 g
- Trans Fat: 0 g
- Carbohydrates: 60 g
- Fiber: 2 g
- Protein: 5 g
- Cholesterol: 105 mg

