

I absolutely adore this Holiday Cracker Candy Recipe because it perfectly combines sweet, salty, and crunchy elements into one irresistible treat. Each bite brings me back to cozy holiday moments, making it my go-to candy for sharing with friends and family. The buttery caramel melds beautifully with the crispy saltine crackers, all topped with a luscious layer of melted chocolate, creating that perfect balance that’s both comforting and festive. I promise, once you try this, it will become a timeless favorite in your holiday baking rotation.
Why You’ll Love This Holiday Cracker Candy Recipe
What really excites me about this Holiday Cracker Candy Recipe is the incredible flavor contrast it delivers. The salty crunch of the saltine crackers paired with the rich, buttery caramel and smooth chocolate is a heavenly combination you wouldn’t expect but will absolutely crave. It’s that sweet-salty magic that hits all the right notes and keeps me sneaking pieces when no one’s looking.
Beyond taste, I truly appreciate how simple and quick this recipe is to pull together. The ingredients are pantry staples, and the steps are straightforward, which means I can make it even on a busy day yet impress my guests with a beautiful, sophisticated candy. Plus, it’s perfect for so many occasions — holidays, party snacks, or even thoughtful homemade gifts. It stands out because you get that homemade charm with such minimal fuss, which I find invaluable during the holiday hustle.
Ingredients You’ll Need
These ingredients are delightfully simple but powerful—they each bring a unique touch that defines the flavor and texture of this candy. From the crisp saltines creating the base to the silky melted chocolate crowning the treat, every item is essential for that perfect bite.
- Saltine crackers: About 28 to 35 crackers, enough to line your baking tray in a single layer, serving as the crunchy backbone.
- Dark brown sugar: One cup firmly packed, adding the deep, molasses-rich sweetness that caramelizes beautifully.
- Unsalted butter: Two sticks (225g) provide the creamy base for the caramel and ensure a smooth texture.
- Kosher salt: Just a quarter teaspoon to enhance all the flavors and balance sweetness.
- Vanilla extract: One teaspoon for that warm, fragrant touch that rounds out the caramel.
- Semi-sweet chocolate: Two cups, chopped for melting into a rich, glossy topping with a slight bittersweet edge.
Directions
Step 1: Preheat your oven to 400°F. Line a 10×15-inch jelly roll pan with nonstick aluminum foil—this helps with easy removal later—or use heavy-duty foil lightly sprayed with baking spray. Lay the saltine crackers in a single even layer to cover the entire bottom.
Step 2: Next, make the caramel sauce by combining the brown sugar, butter, and kosher salt in a medium saucepan. Cook over medium heat, stirring frequently, until the butter melts. Keep stirring as the mixture begins to bubble gently, cooking for 3 to 5 minutes so it smooths out into a glossy caramel sauce. Be careful not to let it boil longer than 30 seconds.
Step 3: Remove the pan from the heat and stir in the vanilla extract for that lovely aromatic finish. If you worry about graininess, I like to use a wet pastry brush on the sides of the pan to ensure all sugar crystals dissolve evenly.
Step 4: Pour the hot caramel evenly over the arranged crackers. Spread it carefully so every cracker is coated. Move the pan to the oven and bake for 5 minutes. You’ll know it’s ready when the caramel is bubbly and irresistible.
Step 5: While the caramel and crackers bake, melt the chocolate. Place the chopped chocolate in a microwave-safe bowl and heat in 30-second intervals, stirring after each session until the chocolate is silky smooth, which usually takes around 1 and a half minutes total.
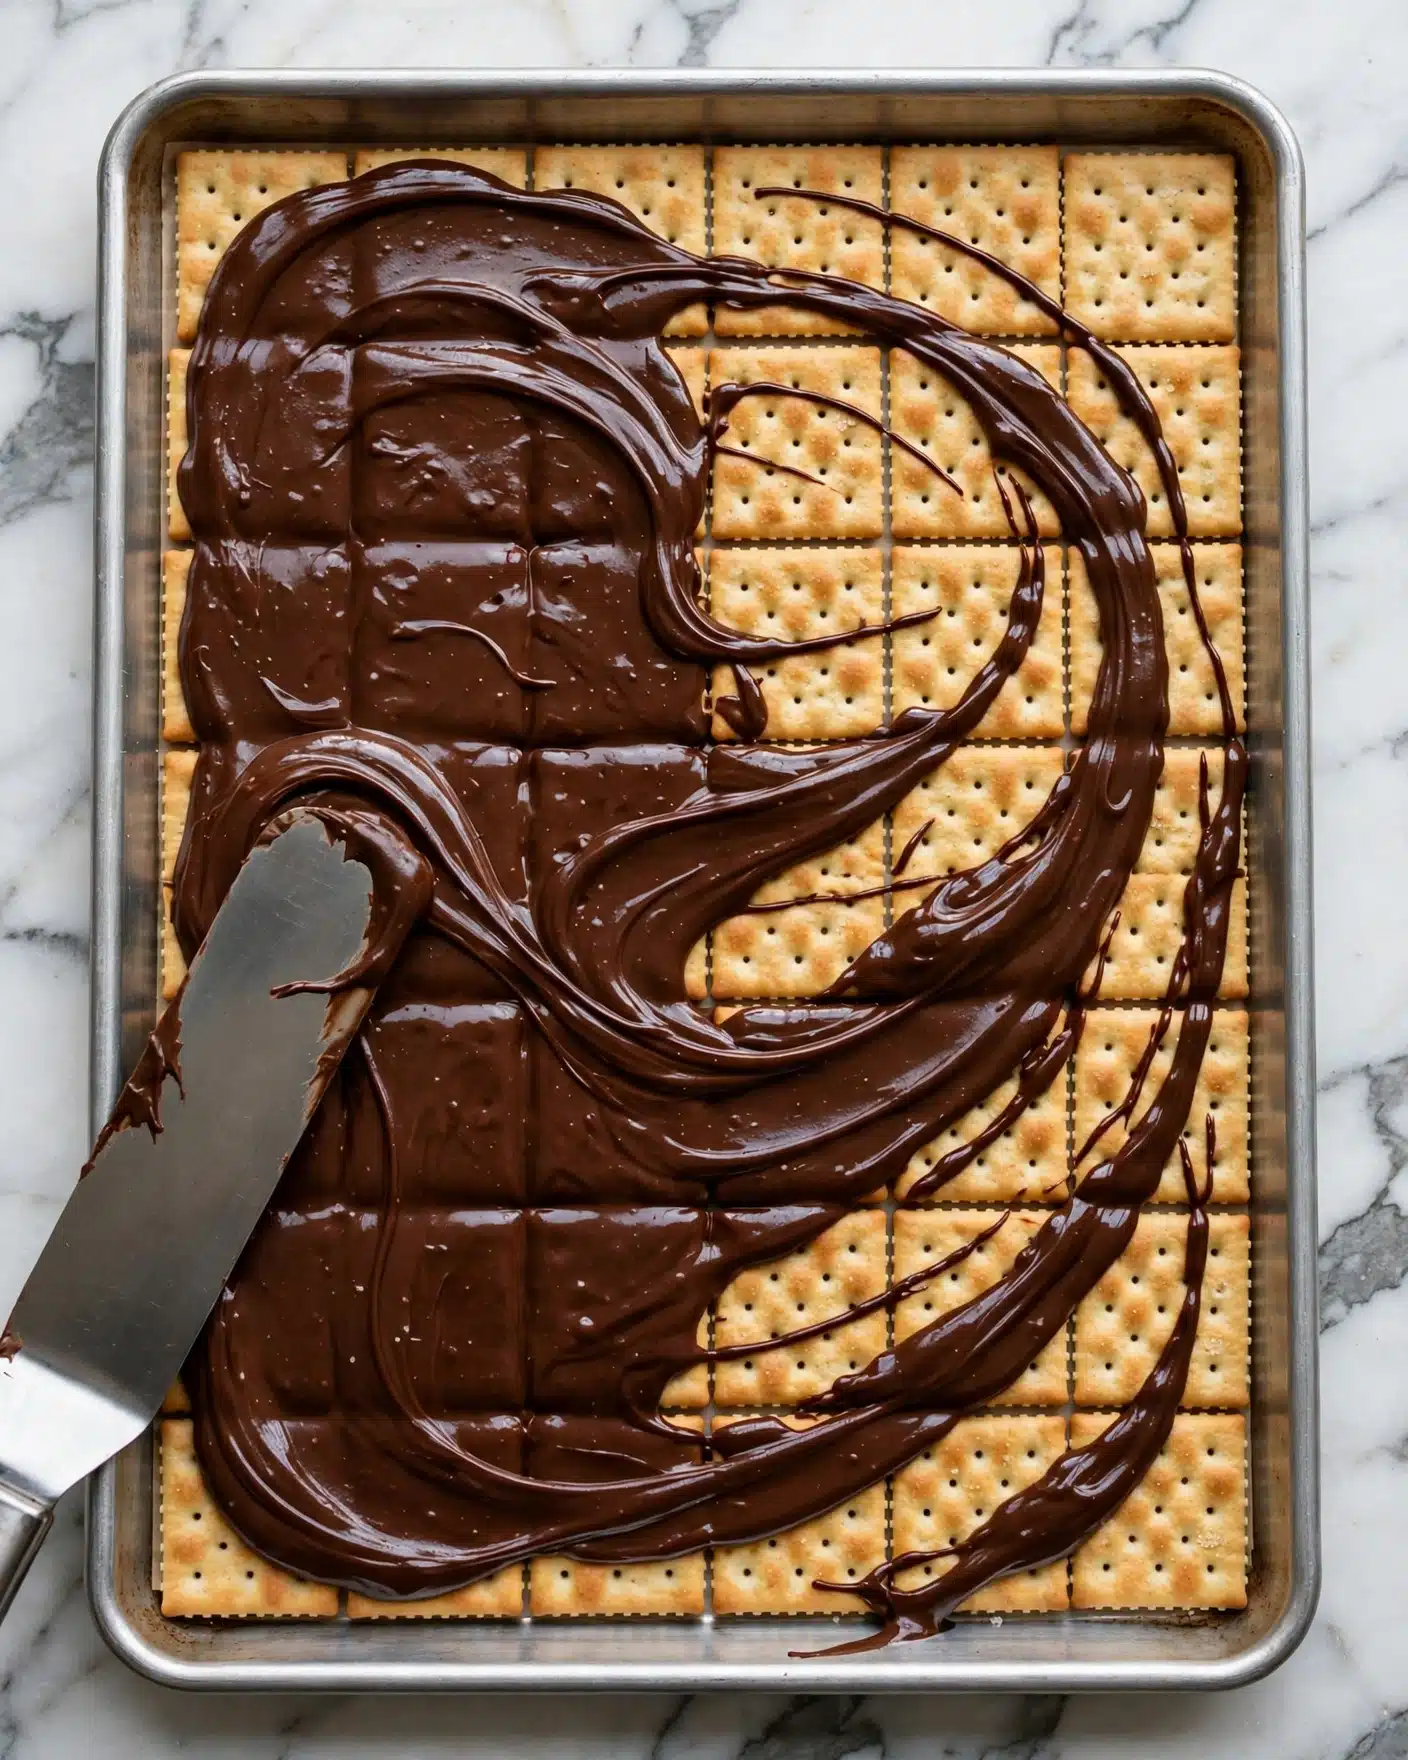
Step 6: When the crackers come out of the oven, let them cool for exactly 1 minute so the caramel stops bubbling and the crackers settle, then pour the melted chocolate over the top. Use a spatula to spread it evenly for a glossy, mouth-watering finish.
Step 7: Let the candy cool completely to room temperature before transferring the pan to the refrigerator. Chill it overnight or for at least 8 hours, allowing the chocolate to set firmly and the caramel to coat the crackers beautifully.
Step 8: Once fully chilled, carefully lift the foil to remove the entire candy sheet from the pan. Peel the foil away gently to avoid tearing and cut into approximately 35 snack-sized pieces using a sharp chef’s knife. I find using a knife easier than breaking by hand for clean edges.
Servings and Timing
This recipe yields about 35 pieces, making it perfect for sharing at parties or gifting. It takes roughly 10 minutes to prep, about 15 minutes to cook the caramel and bake the crackers with the topping, and requires a chilling time of about 8 hours to ensure it sets perfectly. Altogether, plan for about 8 hours and 25 minutes from start to finish, mostly because of the cooling time, which is absolutely worth it to get that perfect texture.
How to Serve This Holiday Cracker Candy Recipe

I love serving this candy chilled at room temperature to showcase its crunchy yet chewy textures. It pairs wonderfully with a hot cup of coffee or tea, which cuts through the sweetness and enhances the caramel notes. For festive occasions, I sprinkle a few flakes of sea salt on top before serving to bring a delightful finishing touch that surprises guests.
Presentation is so fun with this candy! I often arrange pieces on a decorative holiday platter lined with parchment paper, garnished with fresh cranberries or sprigs of rosemary for a pop of color and an elegant touch. You can also wrap individual pieces in festive cellophane bags tied with ribbons to create charming homemade gifts that everyone raves about.
For beverage pairings, I find a glass of sparkling wine or a rich port works beautifully. Non-alcoholic options like spiced apple cider or a creamy hot chocolate complement the candy’s flavors too, making it versatile for any crowd. It’s really perfect for family dinners, holiday parties, or even casual gatherings where you want an easy yet impressive dessert option that guests can pick up and enjoy.
Variations
One of my favorite things about this Holiday Cracker Candy Recipe is how easy it is to customize. For instance, you can swap out semi-sweet chocolate for milk or dark chocolate depending on your mood or your crowd’s preferences. I’ve even experimented with white chocolate, which adds a lovely visual contrast and sweeter flavor.
If you’re accommodating dietary preferences, the recipe can be tweaked as well. Use a dairy-free margarine instead of butter to make it vegan-friendly, and choose gluten-free crackers to cater to those with gluten sensitivities. The caramel will still come out rich and luscious, though the texture might be slightly different, which I find quite lovely.
For a fun twist, I like to sprinkle chopped nuts like pecans or almonds on top of the melted chocolate before chilling for an added crunch. You can also dust the chocolate with a pinch of cinnamon or cayenne pepper for that hint of warm spice or heat, which always surprises and delights my guests. Using different cooking methods like a double boiler for melting chocolate instead of a microwave also helps if you want extra control over the melting process.
Storage and Reheating
Storing Leftovers
I keep any leftover Holiday Cracker Candy in an airtight container in the refrigerator to maintain its crispness and to prevent the chocolate from sweating. Layering the pieces with parchment or wax paper helps keep them from sticking together. Properly stored, the candy stays fresh for about a week, making it easy to enjoy over several days without losing that delightful crunch.
Freezing
This candy also freezes beautifully! To freeze, I layer the pieces in a freezer-safe container separated by parchment paper so they don’t clump. Wrapping the container tightly with plastic wrap adds an extra barrier against freezer odors. Stored this way, the candy keeps well for up to 2 months. When you’re ready to indulge, simply thaw in the fridge overnight for the best texture retention.
Reheating
Since this candy is meant to be enjoyed chilled or at room temperature, I don’t recommend reheating it as the chocolate can melt and the caramel texture can change. Instead, if the candy has been in the fridge and is too firm, just let it sit at room temperature for 10 to 15 minutes before serving. This step softens the caramel slightly while keeping the chocolate intact for the perfect bite every time.
FAQs
Can I use a different type of cracker instead of saltines?
While saltine crackers are traditional here due to their salty, neutral flavor and crisp texture, you could experiment with other thin, crunchy crackers. Just keep in mind that sweeter crackers might change the balance of saltiness and sweetness in the candy, so it’s worth trying a small batch first.
What if my caramel turns out grainy instead of smooth?
A grainy caramel usually happens if the sugar hasn’t fully dissolved or the mixture boiled too long. Using a wet pastry brush to wash down sugar crystals from the sides of the pan while cooking helps a lot. Also, removing the caramel from heat promptly after it boils will keep it smooth and silky.
Can I make these candies ahead of time for a party?
Absolutely! This candy is fantastic for making a day or two ahead. In fact, chilling it overnight enhances the flavors and makes it easier to cut. Just store it well in an airtight container in the fridge until you’re ready to serve.
Is it possible to use milk chocolate instead of semi-sweet chocolate?
Yes, milk chocolate is a delicious alternative if you prefer a sweeter, creamier topping. Just be mindful that it is softer and sweeter, so it will alter the candy’s overall flavor profile slightly, but many people love that version too.
How do I cut the candy without it cracking or crumbling?
I recommend using a sharp chef’s knife warmed slightly under hot water and then dried before slicing. This technique helps the knife glide smoothly through the chocolate and caramel layers without cracking or crumbling the pieces. Cutting after the candy is fully chilled also yields cleaner pieces.
Conclusion
I can’t recommend this Holiday Cracker Candy Recipe enough for anyone looking to add a delicious, homemade touch to their festive treats. With just a handful of simple ingredients and an impressively easy process, you’ll be rewarded with a candy that’s bursting with flavor and texture. Give it a try, and I guarantee it will become a beloved tradition in your home too!
PrintHoliday Cracker Candy Recipe

Holiday Cracker Candy is a festive treat featuring a crunchy saltine cracker base topped with a rich brown sugar caramel and a smooth layer of melted semi-sweet chocolate. This easy-to-make candy combines salty and sweet flavors perfect for holiday gifting or snacking.
- Prep Time: 10 mins
- Cook Time: 15 mins
- Total Time: 8 hrs 25 mins
- Yield: About 35 pieces
- Category: Dessert
- Method: Baking
- Cuisine: American
Ingredients
Base
- 28 to 35 saltine crackers (about one sleeve, enough to line your tray)
Caramel Sauce
- 1 cup (220g) firmly packed dark brown sugar
- 1 cup (225g or 2 sticks) unsalted butter
- 1/4 teaspoon kosher salt
- 1 teaspoon vanilla extract
Chocolate Topping
- 2 cups (10 to 12 ounces) chopped good-quality semi-sweet chocolate
Instructions
- Preheat Oven: Preheat your oven to 400°F (204°C). Line a 10×15-inch jelly roll pan with nonstick aluminum foil or lightly spray regular heavy-duty foil with baking spray. Arrange the saltine crackers in a single layer on the bottom of the pan.
- Make Caramel Sauce: In a medium saucepan, combine the dark brown sugar, unsalted butter, and kosher salt. Cook over medium heat, stirring frequently until the butter melts and the mixture comes to a gentle boil. Continue cooking and stirring for 3 to 5 minutes, ensuring the sugar melts and emulsifies with the butter to form a smooth sauce. Avoid boiling for more than 30 seconds to prevent burning. Remove from heat and stir in the vanilla extract. For smooth caramel, periodically brush down the sides of the pan with a wet pastry brush to dissolve stray sugar crystals.
- Coat Crackers: Pour the hot brown sugar caramel evenly over the arranged saltine crackers. Use a spatula to spread the caramel ensuring all crackers are well coated.
- Bake Caramel-Coated Crackers: Place the pan in the preheated oven and bake for 5 minutes until the caramel is bubbly and hot.
- Melt Chocolate: While the crackers bake, place the chopped semi-sweet chocolate in a microwave-safe bowl. Microwave on high in 30-second increments, stirring after each, until fully melted and smooth, approximately 1.5 minutes total.
- Add Chocolate Layer: Remove the pan from the oven and let the crackers cool for exactly one minute until the caramel stops bubbling and the crackers settle. Pour the melted chocolate over the caramelized crackers and spread evenly with a spatula.
- Chill the Candy: Allow the pan to cool to room temperature before transferring to the refrigerator. Chill the candy overnight to set.
- Cut and Serve: Once chilled and set, remove the candy sheet from the pan by peeling off the foil carefully. Discard any foil pieces stuck to the caramel. Using a chef’s knife, cut the candy into snack-sized pieces or break by hand.
- Storage: Store the cracker candy in an airtight container in the refrigerator for up to one week or freeze between parchment layers for up to two months.
Notes
- Use nonstick foil if possible or spray heavy-duty foil to help prevent sticking.
- A wet pastry brush helps prevent grainy caramel by rinsing down sugar crystals.
- Do not overcook the caramel; boiling more than 30 seconds can cause bitterness.
- Chilling overnight ensures the chocolate sets completely for clean cutting.
- Store in airtight containers to maintain freshness and prevent moisture absorption.
- This candy can be made with milk or dark chocolate as a variation.


