Strawberry Cake Pops Recipe
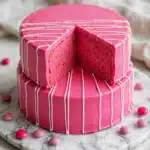
Delight in these charming Strawberry Cake Pops that combine moist strawberry cake with creamy frosting and a smooth candy coating. Perfectly bite-sized and beautifully decorated, these cake pops are fun to make and even more fun to share at parties or special occasions.
- Prep Time: 20 minutes
- Cook Time: 40 minutes
- Total Time: 1 hour 20 minutes
- Yield: 22 cake pops
- Category: Dessert
- Method: Baking
- Cuisine: American
- Diet: Vegetarian
Ingredients
Cake and Frosting
- 1 strawberry cake mix (including ingredients required to prepare it as per package directions)
- 3 Tbsp cream cheese frosting
Candy Coating
- 24 oz pink candy melts
- 4 oz white candy melts
- 4-6 oz shortening (to thin candy melts)
Instructions
- Prepare the Cake: Follow the instructions on your strawberry cake mix package to prepare the batter. Pour the batter into a baking pan and bake in the oven until a toothpick inserted into the center comes out clean, indicating the cake is fully baked.
- Mix Cake with Frosting: After baking, while the cake is still warm, crumble it into a mixing bowl or a stand mixer fitted with a paddle attachment. Add 3 tablespoons of cream cheese frosting and mix thoroughly until a dough-like consistency is achieved. This cake pop dough should be firm enough to mold.
- Fill Cake Pop Molds and Freeze: Press the cake pop dough into smaller cake pop molds, making sure to scrape off any excess from the top for an even shape. Place the molds in the freezer for 15 to 30 minutes to help the cake pops firm up.
- Melt Pink Candy Coating: While the cake pops are freezing, melt about 1 cup of the pink candy melts with 1 teaspoon of shortening in the microwave. Heat in short bursts and stir regularly until the mixture is smooth and slightly thinned for easier dipping and molding.
- Assemble Cake Pops with Candy Coating: Remove the cake pops from the freezer and carefully pop them out of the smaller molds. Pour melted pink candy melts halfway into a larger cake pop mold, place the cake pop center inside, and press down gently to allow the candy melts to surround and cover the cake evenly. Scrape off any extra candy from the mold surface to create a neat shape.
- Set the Cake Pops: Place the filled larger mold into the refrigerator for 10 to 15 minutes to allow the candy coating to fully set and harden around the cake.
- Decorate and Serve: Once set, remove the cake pops from the mold. Use the remaining white candy melts to decorate your cake pops as desired. Let any additional decorations set before serving and enjoying these delightful treats.
Notes
- Start mixing the cake and frosting while the cake is still warm for easier blending.
- Shortening helps thin the candy melts for a smoother coating and easier handling.
- Freezing the cake pops before coating ensures they stay firm and hold their shape during dipping.
- Decorate with the white candy melts or other edible decorations for a personalized touch.
- If you don’t have molds, you can shape the cake balls by hand and dip them in candy melts using a spoon or fork.
Find it online: https://cookedbysarah.com/strawberry-cake-pops-recipe/